
TM 9-2320-366-20-4
11-23.
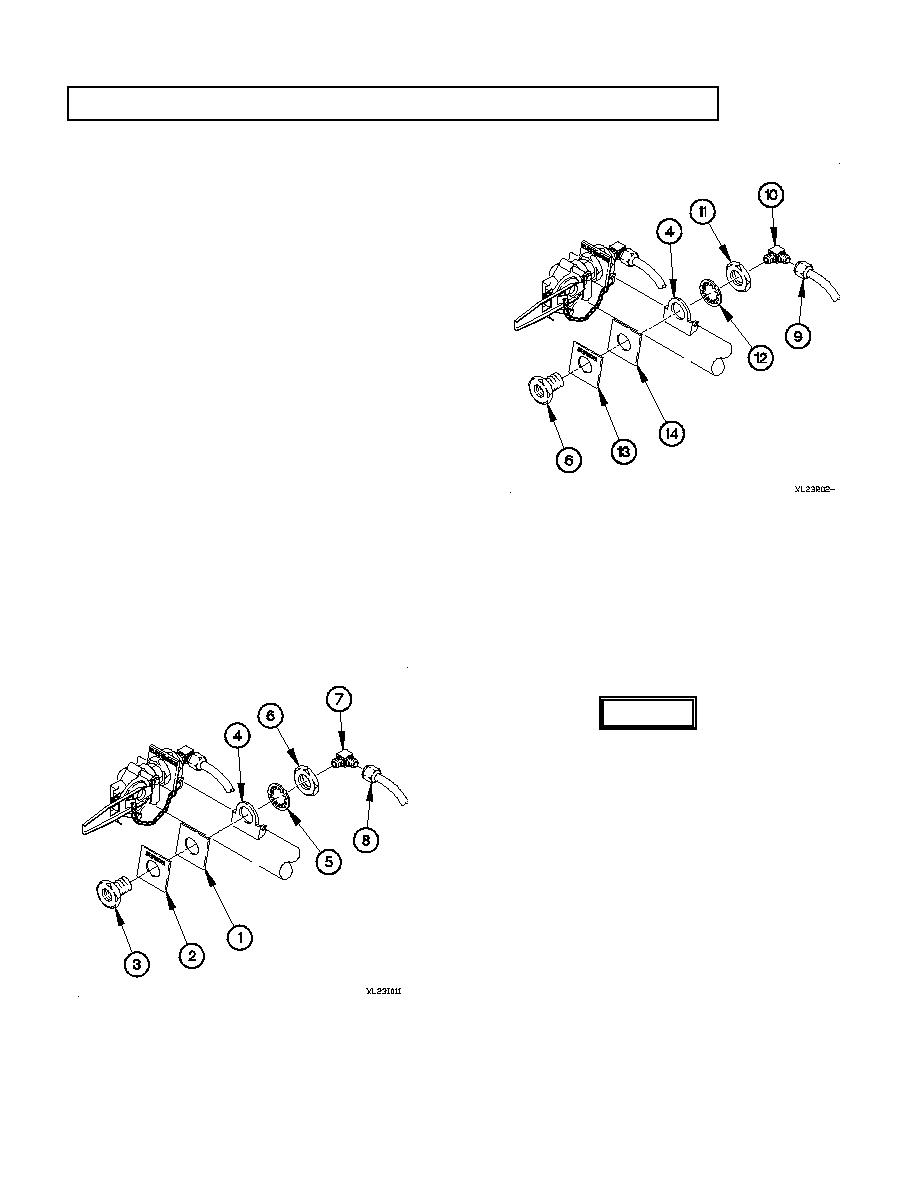
FRONT GLADHAND REPLACEMENT (CONT)
(5) Disconnect air hose (9) from 90-degree fitting (10).
(6) Remove 90-degree fitting (10) from adapter (6).
(7) Remove nut (11), lockwasher (12), adapter (6),
identification plate (13), and plate (14) from mounting
bracket (4). Discard lockwasher.
b. Installation.
NOTE
Both front gladhands are installed the same
way. Service gladhand shown.
Install plastic cable ties as required.
(1) Install plate (1), identification plate (2), and adapter (3)
on mounting bracket (4) with lockwasher (5), and nut (6).
WARNING
Adhesives, solvents, and sealing com-
pounds can burn easily, can give off
harmful vapors, and are harmful to skin
and clothing. Keep away from open fire
and use in a well-ventilated area. If
adhesive, solvent, or sealing compound
gets on skin or clothing, wash
immediately with soap and water. Failure
to comply may result in injury to
personnel.
(2) Apply antiseize compound to threads of 90-degree fitting
(7).
(3) Install 90-degree fitting (7) in adapter (3).
(4) Connect air hose (8) to 90-degree fitting (7).
11-152
