
TM 9-2320-366-20-4
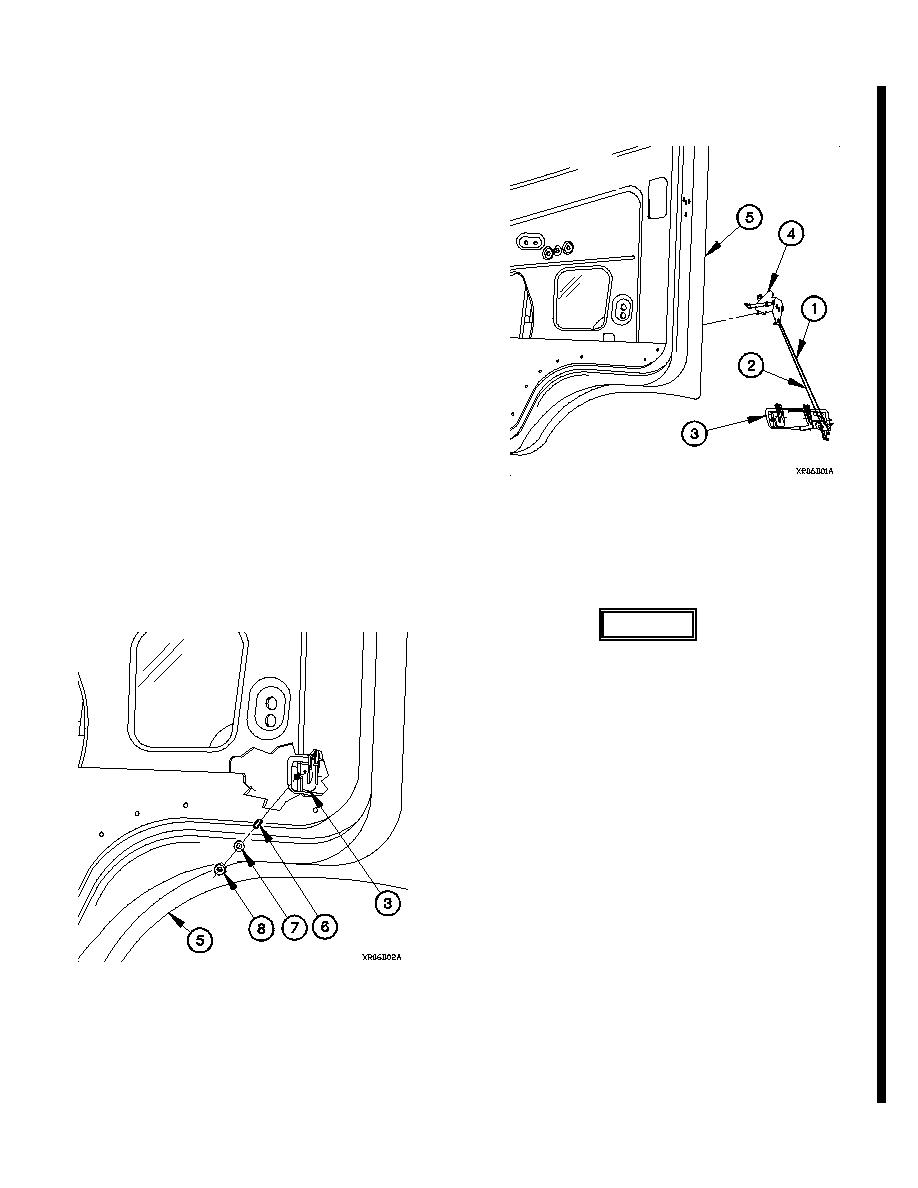
d. Door Latch/Lock Assembly.
NOTE
Both latch/lock assemblies are installed the
same way. Right side shown.
(1) Attach two control rods (1 and 2) between handle/lock
assembly (3) and release assembly (4).
(2) Insert release assembly (4) and two control rods (1 and
2) upward through handle/lock assembly (3) opening in
door (5).
(3) Seat handle/lock assembly (3) into door opening by
pushing handle/lock assembly toward front of vehicle
until rear of handle/lock assembly can enter opening,
then push handle/lock assembly toward rear until
handle/lock assembly is fully seated.
WARNING
Adhesives, solvents, and sealing com-
pounds can burn easily, can give off
harmful vapors, and are harmful to skin
and clothing. Keep away from open fire
and use in a well-ventilated area. If
adhesive, solvent, or sealing compound
gets on skin or clothing, wash
immediately with soap and water. Failure
to comply may result in injury to
personnel.
(4) Apply sealing compound to threads of setscrew (6).
(5) Position handle/lock assembly (3) on door (5) with
setscrew (6).
(6) Tighten setscrew (6) to 70-85 lb-in. (8-10 Nm).
(7) Position washer (7) and nut (8) on setscrew (6).
(8) Tighten nut (8) to 70-85 lb-in. (8-10 Nm).
Change 1
16-47
