
TM 9-2320-272-24-3
4-101. FORWARD-REAR AND REAR-REAR AXLE REPLACEMENT (Contd)
b. Installation
WARNING
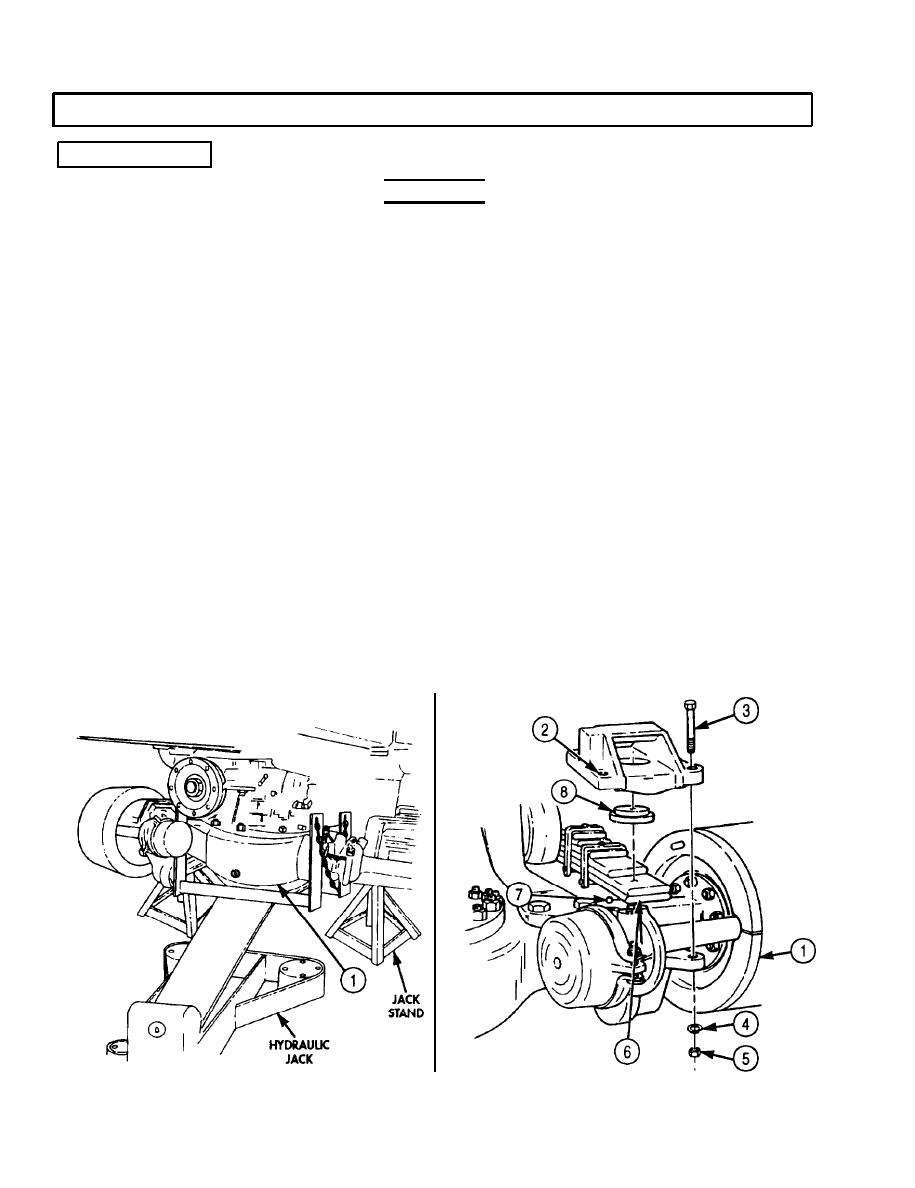
Weight of vehicle must remain supported on jack stands at all
times. Do not attempt to support weight of vehicle on hydraulic
jack. Injury to personnel may result if hydraulic jack fails.
NOTE
Assistant will help with steps 1 through 3.
Position rear axle (1) on hydraulic jack.
1.
Raise rear axle (1) and remove jack stands from under rear axle (1).
2.
Using hydraulic jack, position rear axle (1) under springs (6).
3.
Install spring seat wearpad (8) on left and right upper spring brackets (2).
4.
Install upper spring bracket (2) on left and right leaf springs (6), position over rear axle (1) and
5.
dowel pin (7), and install two screws (3), new lockwashers (4), and nuts (5). Finger-tighten nuts (5).
Install brake chamber bracket (21) on left and right upper spring brackets (2) with washer (20),
6.
screw (19), washer (20), new lockwasher (26), and nut (25). Finger-tighten nuts (25).
Position two upper torque rod brackets (29) over dowel pins (34) on rear axle (l), and install on
7.
upper torque rod plates (31) with four screws (30), new lockwashers (32), and nuts (33).
Install U-bolt bracket (24) and U-bolt (23) on left and right service brake chamber brackets (21)
8.
with two washers (27) and nuts (28).
NOTE
Assistant will help with step 9.
Install brake chamber bracket (17) on left and right upper spring brackets (2) with washer (12),
9.
screw (11), washer (12), new lockwasher (16), and nut (15). Tighten nuts (5), (25), and (15)
350-375 lb-ft (475-509 Nm).
Install U-bolt bracket (14) and U-bolt (13) on left and right spring brakes (18) with two washers (10)
10.
and nuts (9).
4-570

